So you have been following the blogs on Android development for some time now, and the topic seems an interesting one to you. There are possibilities that you have gone through a technical blog on Android app development and finding it hard to cope with the information that is shared there.
In case, you don’t have a coding background the agony can be painful. And if you do not have a clue on where to start, we are here to offer you a helping hand.
In case learning to code seems complicated to you, Android development will seem more challenging. And, when you have the apt app development idea in your mind, it is far better to learn the hacks of coding rather than hiring the assistance of a developer. There are Android specific environments that you need to learn about along with understanding the Java programming language.
In short, creating the app in Android environment will ask for your expertise in a number of areas including basic knowledge on SDK (software development kit), IDE (Integrated development environment) such as Android Studio or Eclipse, Java software development kit (JDK) along with the necessary information on how to test your app after developing the same.
All this information will only feed you with initial development, and you will need to indulge yourself into deep coding to register your app in Google Play.
The dense amount of information available for “Android app development” may confuse an amateur, so I am starting from the very basic and going to offer you insightful information on how to kickstart the development of Android applications. This approachable guide will help you to know the hacks of creating Android apps with the utmost ease that are viral between the expert software development companies in the USA.

Starting With Android App Development: Step-By-Step Guide
App development might seem as daunting, but it can open a world of opportunities if done right. Learning app development is not as difficult as it seems to be if you have a proper roadmap. Let’s start with learning the steps to begin Android app development. Keep something to eat along as this may take a while:
Step 1: Download Android App Studio
The very first requirement you need to fulfill with the Android app development approach is to get software called Integrated Development Environment or IDE. Android Studio is the most common IDE used for Android application development. Google offers it for free, and thus you can have all the tools and the related technique at your disposal after getting your development kit downloaded from Android Studio.
The significance of downloading IDE lies in having the UI to enter and commit your code. The powerful software will highlight the things for you in case you enter the wrong value.
The environment will offer excellent suggestions to help you test the codes you have created inside the integrated Android environment. IDE or Integrated Development Environment provides you the basic layout to save your efforts.
Android Studio is specifically designed for Android app development, which promises you to offer the elements related only to the Android OS. You can also test your application without many efforts, and that is another benefit of using the IDE.
However, while going through the installation, ensure the boxes are ticked to add on all the additional components you want in your application. These components can be added later; however, it is suggested to add them in this phase only.
Besides Android Studios, there is a list of other components that can be used alternatively. These include Eclipse and Basic4Android that will equally help you to build the app in an outstandingly designed Android ecosystem.
All of these ecosystems have their exceptional functionalities. However, Android Studios is the best for beginners. You must have downloaded the Android Studios by now and here comes the second step.
Step 2: Organizing The Android Studio
The next step is to install Java on your system to use Android Studio. You will need to install a Java Development Kit (JDK) as the programming language is vital to build the application.
It will also help to compile your code. This compilation will help to change the codes into something easy to understand by the users. Just download the java development kit and install it for organizing the Java environment.
Now it is time to launch Android Studio. As soon as you open it after download, you will be presented with a menu to configure the elements. Take some time out to get familiarize with SDK Manager that you will find under (configure>SDK Manager). It will help you to manage your Android SDK to get the support for newer versions.

As Android Studio offers you a friendly interface, it gets easier to code further.
Step 3: Starting the project
Once you have downloaded (in the very first step) & installed (in the second step) the Android SDK, it is now time to go a step back to start your very own Android Studio project. And, to initiate, name your application by adding the app name in the “company domain” page.
There will be many other elements too that you will have to enter along with the app name. The window will show like:
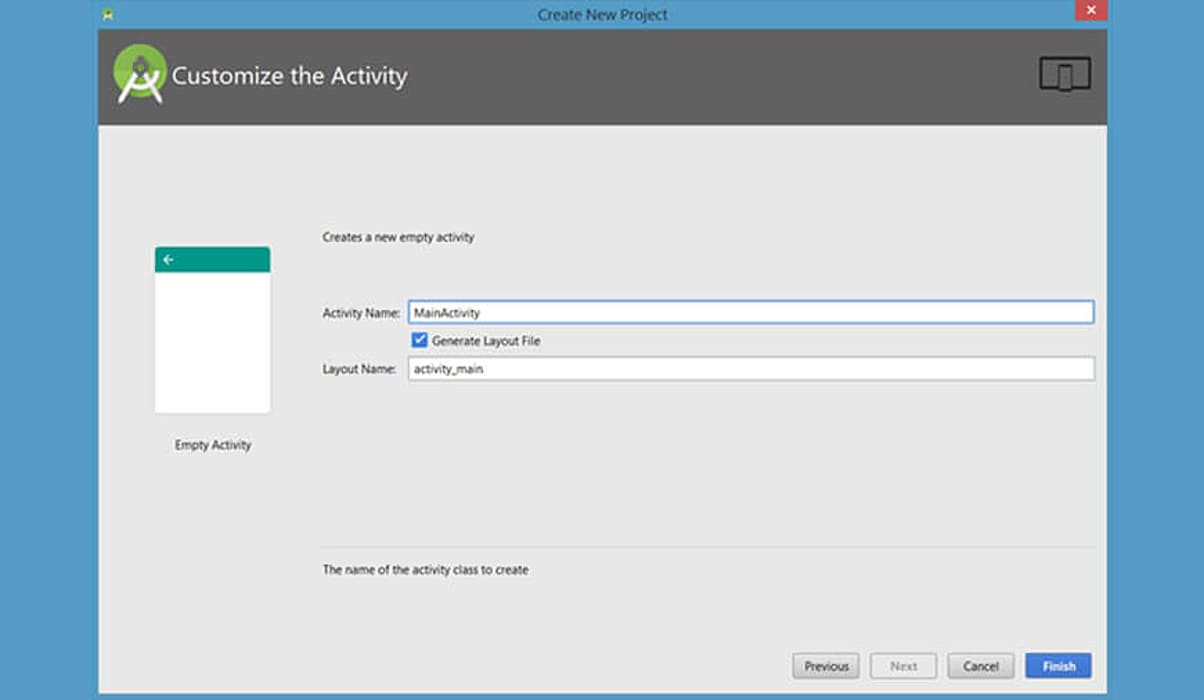
After filling all these details, the last field you will enter is the directory where you could save all aspects of your application. It is crucial to keep the backup of the codes to have additional access to the codes of your application.
Step 4: App Environment Set up
The next step in setting up the app environment comes to decide what kind of device you are developing your application for. The options include developing apps for the phone as well as Tablets. Now, it comes to choosing the version of Android.
You could either go with “minimum SDK” as it is the lowest Android version or choose to try the latest version of Android depending on the choice. Both of these versions have their pros and cons as the latest Android version may not remain available to as many users as compared to the count of people having the older Android versions available.
Let’s start with the underlying Android 1.1 version. Additionally, using Froyo will restrict you to use all the latest functions the fancy versions are having.
Thus, going with the default option is the best thing you can do at this stage. So, it is good to leave the filed as it is. The next option will come as choosing the look of your app.
You can choose the look from the “activity module” that will serve as the main page of your application. It is the UI of your app so you must go with an option that could seem enticing(display) to the users.

An app can have multiple activities that act similarly like the pages of a website. Your app will also have the “setting” menu and a “main” activity setting. Don’t mistake these alternatives as to the app itself, as these are merely stand-alone functionalities. With your very first application, keep the things as simple as you can by selecting “basic activity.” Click the next button to jump to the next activity.
Now it’s time to pick the activity name and also naming the layout. (choosing “basic activity” will additionally give you the option of “menu_resource” name). The activity name will serve as the names of your activities, so it’s a good idea to name it something logical like “code activity.”
Layout name, on the other hand, is the file that determines the layout of the activity. It is a separate piece of code that defines the elements like images and menus. Now, leave the default name as “activity_main” and move to the next step to choose the name for menu as well as for the title. As the users can see the name you select for this file; so, choose something that will seem exciting and impressive to the users. Click next and here comes your application!
It is, of course, a blank app but it is just the start. So, until this phase, you have learned the basic steps as:
-
Downloading and installing Android Studios along with Android SDK
-
Installing Java SDK
-
Starting a project by selecting the basic details
It was all about the basics you need to learn and now come to the real thing!

Working on Actual Functionality
As soon as you open the app, there will come a directory tree on the left having different files and folders that your app has made up of. There will additionally be a picture of a phone, featuring “Hello World” in the center. (Android Studios displays the Hello World for you, which developers in other app development ecosystem make first to learn the programing language.
In case, you had chosen “Basic Activity” when you started the project; you’ll see an additional XML file named “content_main.xml,” which carries the layout that Android Studios offered to you by choosing “Basic Activity.”
You can edit the elements ( if you want to ) at this stage. The editing can be done through content_main.xml. You can also choose to open it through app > res > content_main.xml.
The Basic Layout
The layout of the Android studio will show the rendering of how the app layout will appear on the screen. The visual editor acts a bit like Dreamweaver and is the savior for the developers and software development companies. There will also appear a bunch of options in the form of “widgets” on the left side down, which you can add to your app if required.
Adding the elements at this stage is effortless as all you need to do is to drag and drop any button to the activity to add functionality. For example, if you wish to add an “ok” button, you can simply drag and drop it anywhere at your app so go ahead and position that “ok” button right under the “Hello World.”
You can also change the text and the ID (the way you refer to each element (called a view) in the Java code. Text merely is what you display to the users.
At this stage, you need to wipe out the “Hello World” widget (or view) and change the text on the button to hello. Additionally, change the “ID” on the button to “button1.”
Folks, it is now time to go for little programming! FYI, when you select a view, options appear in the right bottom to change the color of text, size and other such elements. In case, you would like to change the color and appearance of your button; you can play around with the variables.
Done with the looks of the app? Now jump to the MainActivity.java. You can easily find it placed at the top, but in case it’s not there, search for it under 'App > Java.' The code will define the app behavior, and it requires to add a short passage of coding here as:
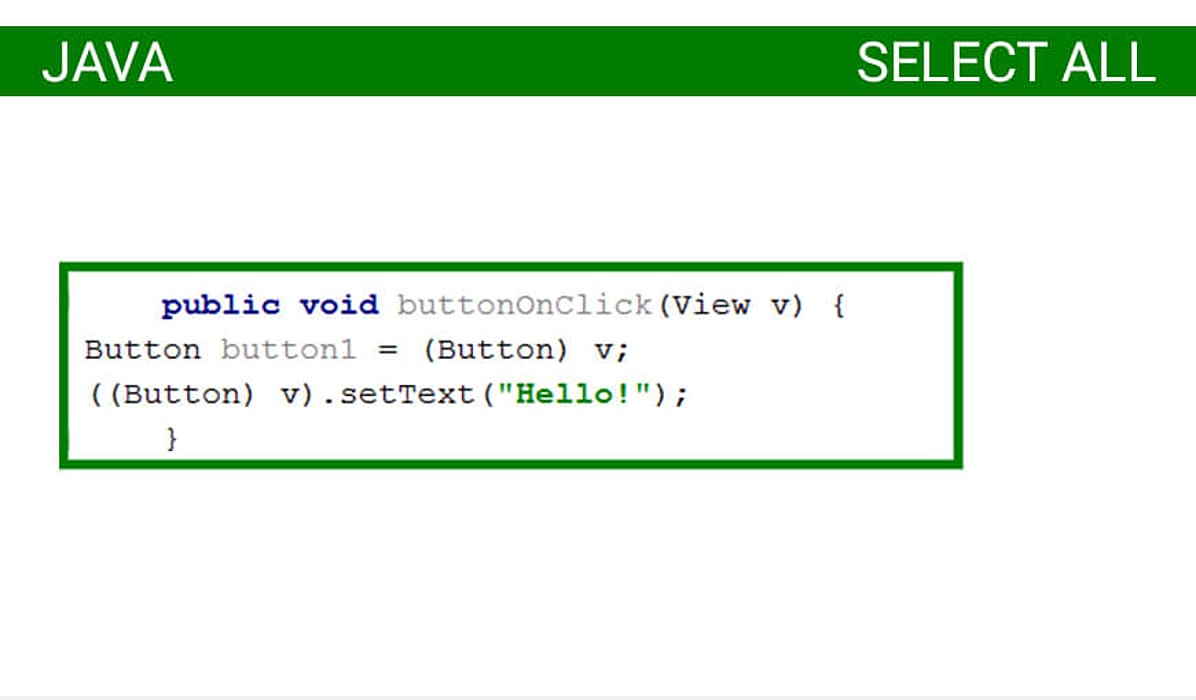
Going through so much of coding mean, anything following “voidbuttonOnClick” will be carried out when someone clicks on the button. We are now going to find the button with “Button button1 = (Button) v;” code and to change the text. Well, there are other ways too that can help you achieve the same result.
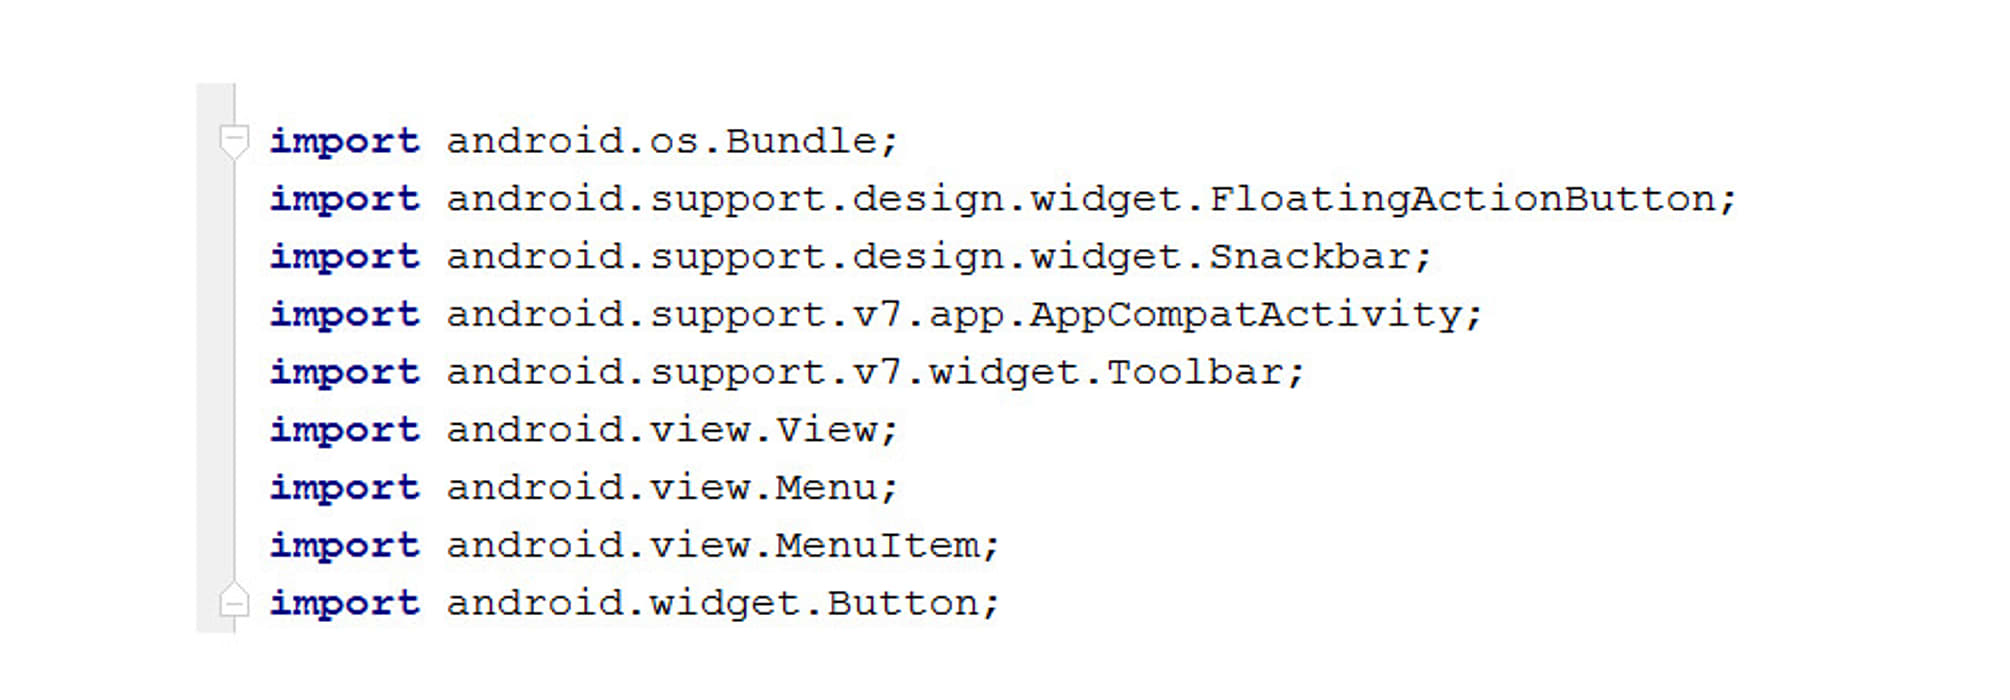
Now get back to the real work, and to start, let’s get at the top of the page where “import” lies. Click on the button to get “import android.widget.Button; You may have encountered the option quite earlier, in case it didn’t appear, add it yourself now. (As you will keep on typing the above-shown code with “;” in the underlying Java formatting, any error if committed will show up automatically).
Get back to the content_main.xml and click on the button. In the corner (RIGHT) where there are other parameters for the button, you will find “onClick.” Select the “onClick” line of code you just wrote from the drop-down menu.
With this option, you have signified Android Studio that you are associating the section of code with the button you have created. (There will be lots of such buttons you will have to create in the future).

It is time to run the application you have just created. And, for the same, go to the “run” command placed at the top and then select “run-app” from the drop-down menu.
You must have your AVD (Android Virtual Device) installed and in case you are not having one, follow the trail: tools > Android > AVD Manager > + Create Virtual Device. You will also need to install the Android version on your device. Your app will appear something like this.
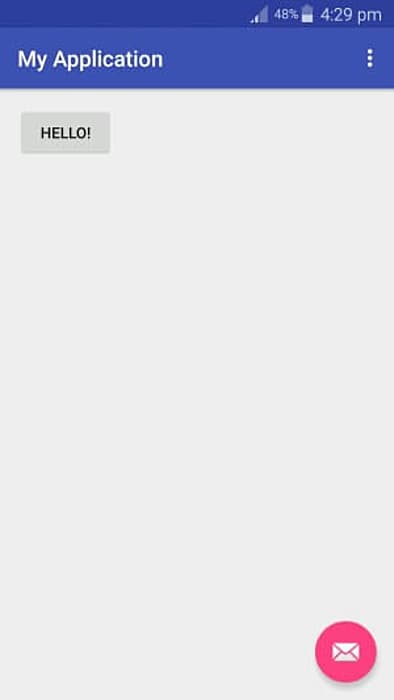
Follow the steps as directed and be patient. Your app may take some time to load. In case, it doesn’t load up, try “packing” the app to create an APK. Drag and drop the same to your Android device and double-click to install and run. Once it is running, you are ready with your app to have fun.
The Bottom Line
It is just a basic layout of learning how to code an Android application. The app we have created is just the nascent stage mobile app development approach.
Your first application can have many additional functionalities that will take it into the category of exceptional apps. Well, the article was meant for educating an amateur to code a basic Android application, and this is what we have served here in this write-up.
Good Luck With Your Android App Development!
Frequently Asked Questions

By Sakshi Kaushik

Content Writer (B2B Editorial)
A passionate writer and tech lover, she strives to share her expertise with mobile app developers and fellow tech enthusiasts. During her moments away from the keyboard, she relishes delving into thriller narratives, immersing herself in diverse realms.


